The Memory Problem with OpenClaw
OpenClaw is an impressive piece of software. The project launched in November 2025, and by March 2026 it had crossed 247,000 GitHub stars, surpassing React as the most-starred project in GitHub history. It connects frontier LLMs to 20+ messaging platforms (WhatsApp, Telegram, Slack, Discord, Signal, Teams) and gives them cron scheduling, file access, and browser control. It's free, MIT-licensed, and runs as a long-running Node.js service that binds a gateway and control UI to port 18789 by default.
That's all great. The catch is memory.
Out of the box, OpenClaw memory is file-driven. You write a SOUL.md, you maintain skill files as markdown, and the agent loads all of it into context on every request. As your notes grow, your token bill grows with them. There is no automatic cleanup, no compression, no semantic search. Details shared in earlier sessions stop showing up in responses. In some cases, as the mem0.ai blog put it, "the agent behaves as if the information was never provided at all." The EngramMemory README frames the general problem bluntly: "Every AI agent on the market forgets everything when the session ends. You spend 30 minutes explaining your codebase, your preferences, your architectural decisions. You close the tab. Tomorrow you start over."
The fix is to replace that flat-file approach with a proper semantic memory backend. This post walks through exactly how to do that on Ubuntu using the EngramMemory/engram-memory-community project, which is a local Docker-based MCP memory server that has explicit OpenClaw integration built in.
A quick note on naming: there are at least four separate projects on GitHub that use the name "Engram." This post covers EngramMemory/engram-memory-community specifically. It is the most documented option, ships as a single Docker container, and includes an OPENCLAW_INTEGRATION.md doc plus an auto-config script. Verify the current README before you run any commands, since container tags change.
Part 1: Installing OpenClaw on Ubuntu
System Requirements
Ubuntu 22.04 LTS or later is the recommended baseline. Ubuntu 20.04 works but 22.04+ is where most documentation assumes you are. You need Node.js 20 or higher. OpenClaw is not in Ubuntu's default apt repositories, so apt install openclaw returns nothing on 22.04, 24.04, or 26.04.
Fix the npm Global Prefix First
A plain npm install -g openclaw@latest will fail for a normal Ubuntu user because npm's default global prefix points into /usr, which requires root. Do not run npm installs as sudo. Instead, redirect the global prefix into your home directory:
mkdir -p "$HOME/.npm-global"
npm config set prefix "$HOME/.npm-global"
Then export the bin directory so the shell can find executables:
export PATH="$HOME/.npm-global/bin:$PATH"Add that export line to your ~/.bashrc (or ~/.profile) so it survives reboots:
echo 'export PATH="$HOME/.npm-global/bin:$PATH"' >> ~/.bashrc
source ~/.bashrc
Install OpenClaw
npm install -g openclawRun Onboarding
The first run writes ~/.openclaw/openclaw.json, builds the ~/.openclaw/workspace directory, and sets up the gateway. Run:
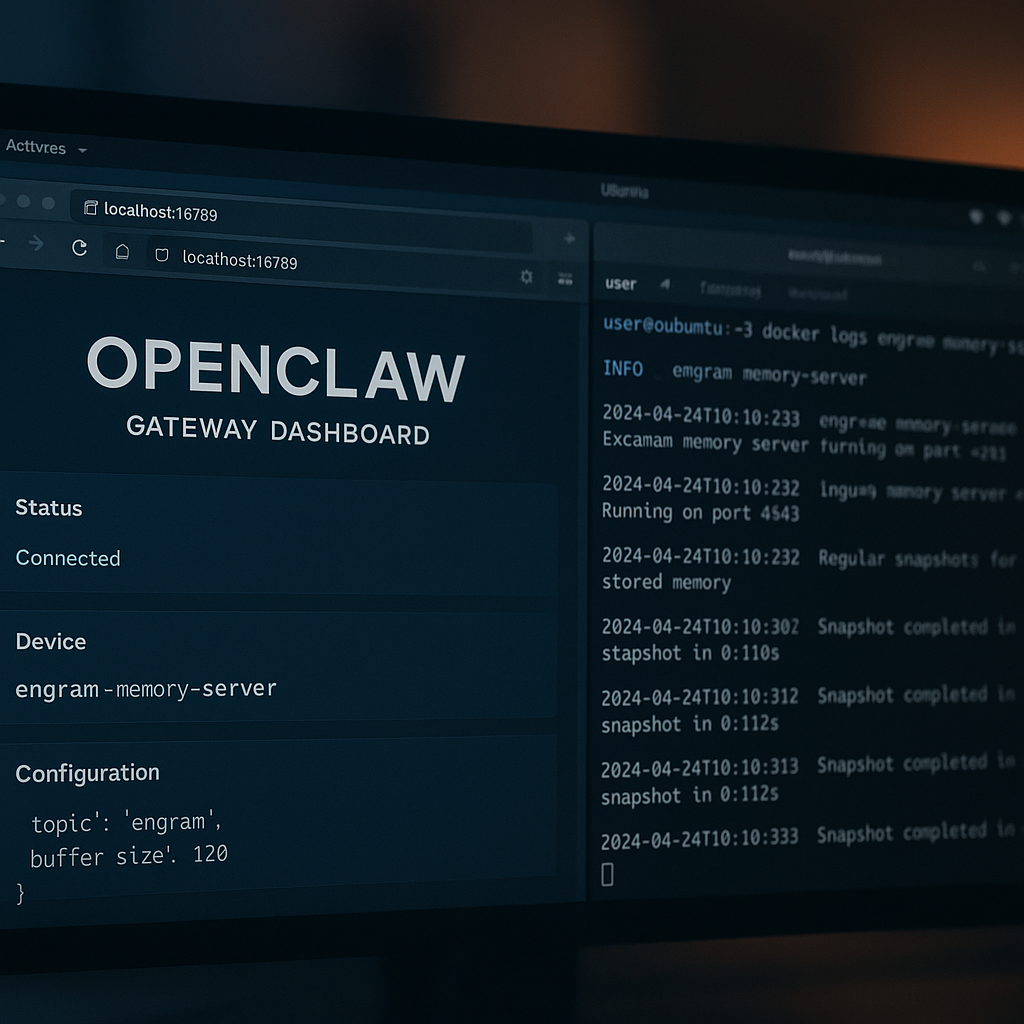
openclawWalk through the interactive prompts. You will connect your LLM provider (Anthropic, OpenAI, or a local model) and optionally link a messaging channel. Once onboarding finishes, open http://localhost:18789 in your browser. That is the web gateway where you configure your AI model, channels, and plugins.
Run OpenClaw as a systemd Service
For a 24/7 server setup, install the systemd unit so OpenClaw restarts on boot:
sudo openclaw service install --systemd
sudo systemctl enable openclaw
sudo systemctl start openclaw
sudo systemctl status openclaw
Linux is genuinely the ideal platform for OpenClaw as a persistent service. The gateway stays up between terminal sessions, which is exactly the environment where a proper memory backend pays off most.
Part 2: Installing Engram (EngramMemory)
What Engram Community Actually Is
The EngramMemory/engram-memory-community project bundles three things into a single Docker container: Qdrant (a vector database), FastEmbed (with native ONNX runtimes for both ARM64 and x86_64), and an MCP server. The s6-overlay process supervisor keeps all three running together. Memories persist in a named Docker volume called engram_data, so a container restart does not wipe your history.
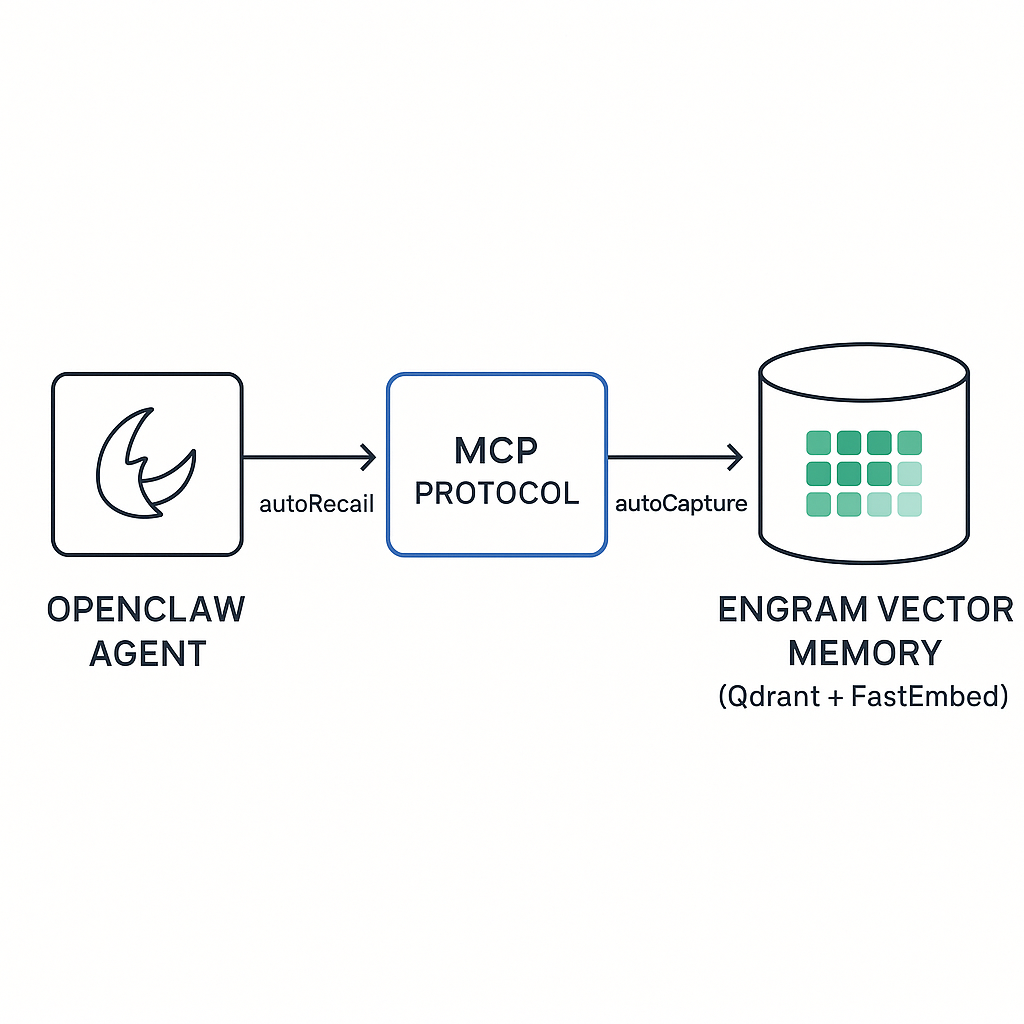
This is the key architectural difference from OpenClaw's default approach. Instead of stuffing everything into a markdown file and loading it into context wholesale, Engram stores memories as semantic embeddings. When your agent needs context, it runs a similarity search and retrieves only the most relevant chunks. Shorter context window usage, better recall precision, lower token costs.
Engram also supports 7 structured memory types: preference, fact, procedure, lesson, decision, task_log, and knowledge. This is not just a blob store. The retrieval layer can filter by type, which means your agent can specifically look up past decisions versus general facts versus user preferences.
The system tracks memory age, access frequency, and relevance decay. According to the dev.to write-up on this integration, "a task log from 3 weeks ago that was never recalled again gets compressed into a one-line summary, then eventually dropped." That is automatic memory management you do not have to think about.
Privacy is worth calling out directly. Engram Community is local-only by default. No data leaves your machine. No API keys required for the memory layer.
Prerequisites
You need Docker installed and running. On Ubuntu 22.04+:
sudo apt update
sudo apt install -y docker.io
sudo systemctl enable --now docker
sudo usermod -aG docker $USER
newgrp docker
Install via the Setup Script (Recommended)
Clone the repo and run the bundled setup script. This is the easiest path because it handles the Docker run command, auto-registers the MCP server with Claude Code if you use it, and generates an OpenClaw config file:
git clone https://github.com/EngramMemory/engram-memory-community.git
cd engram-memory-community
bash scripts/setup.sh
The script brings up the container, creates the engram_data volume, and writes out the OpenClaw integration config. Check the terminal output for the exact file path it writes to.
Manual Docker Start (Alternative)
If you prefer to understand exactly what is running before you run a script, pull and start the container manually. Check the current README at https://github.com/EngramMemory/engram-memory-community for the exact image tag and port flags before copying any command, since these change between releases. The general pattern is a standard docker run with the engram_data volume mounted and the MCP port exposed.
Part 3: Connecting Engram to OpenClaw
MCP Integration
OpenClaw fully supports the Model Context Protocol. Engram exposes itself as an MCP server, which is the integration point. If you used bash scripts/setup.sh, the OpenClaw config was already generated for you. Open it, verify the MCP server URL points to your local Engram instance, and then restart OpenClaw:
sudo systemctl restart openclawConfig Options
The Engram repo includes docs/OPENCLAW_INTEGRATION.md which documents the full set of plugin config options. The four key ones to know about are:
- autoRecall. Automatically queries Engram for relevant memories before each agent response
- autoCapture. Automatically saves notable information from conversations into Engram
- maxRecallResults. Caps how many memory results get injected into context per turn
- minRecallScore. The similarity threshold below which a memory is not returned
Tuning minRecallScore is worth spending a few minutes on. Too low and you get noise; too high and genuinely relevant older memories get filtered out. Start with the defaults from OPENCLAW_INTEGRATION.md and adjust from there.
Why This Combination Works
The core advantages, as documented at lobehub.com, are: private local storage, no cloud or token costs for the memory layer, reduced context-window loss, and continuous agent continuity across workflows and sessions.
But the practical experience is harder to articulate with a bullet list. One developer who documented this setup put it this way: "Engram made the AI feel like a colleague who'd been working with me for months, not a stranger I had to re-brief every morning."
That shift happens because the memory layer is doing three things the default file approach cannot. First, it retrieves semantically relevant context rather than loading everything. Second, it categorizes memories by type so retrieval is precise. Third, it handles its own lifecycle without your involvement.
With default OpenClaw memory, you are the memory manager. You maintain SOUL.md, you clean up stale notes, you worry about context bloat. With Engram running locally, the agent accumulates structured knowledge about your preferences, decisions, and working patterns over time, retrieves what is relevant when it is relevant, and quietly compresses or drops what has gone stale.
For anyone running OpenClaw on a 24/7 Ubuntu server, which is exactly the scenario this setup targets, that continuity compounds over days and weeks into something that genuinely changes how useful the agent is. The combination of a persistent systemd service and a local semantic memory backend is what makes OpenClaw behave like a long-running assistant rather than a very capable chat session that resets on every tab close.